User assignment to specific group
4 min
Step-by-Step: Configure Default Group Mapping via Okta SSO
1. Configure Attribute in Okta Directory
- Log in to the Okta Admin Portal
- From the left panel, go to Directory
- Select Profile Editor
- Choose Default Workspace
- Click Add Attribute
- Fill in the details as follows:
- Data Type: String
- Display Name: DefaultGroup
- Variable Name: DefaultGroup This will automatically be exposed as user.defaultGroup
- Copy the variable name: user.defaultGroup
-
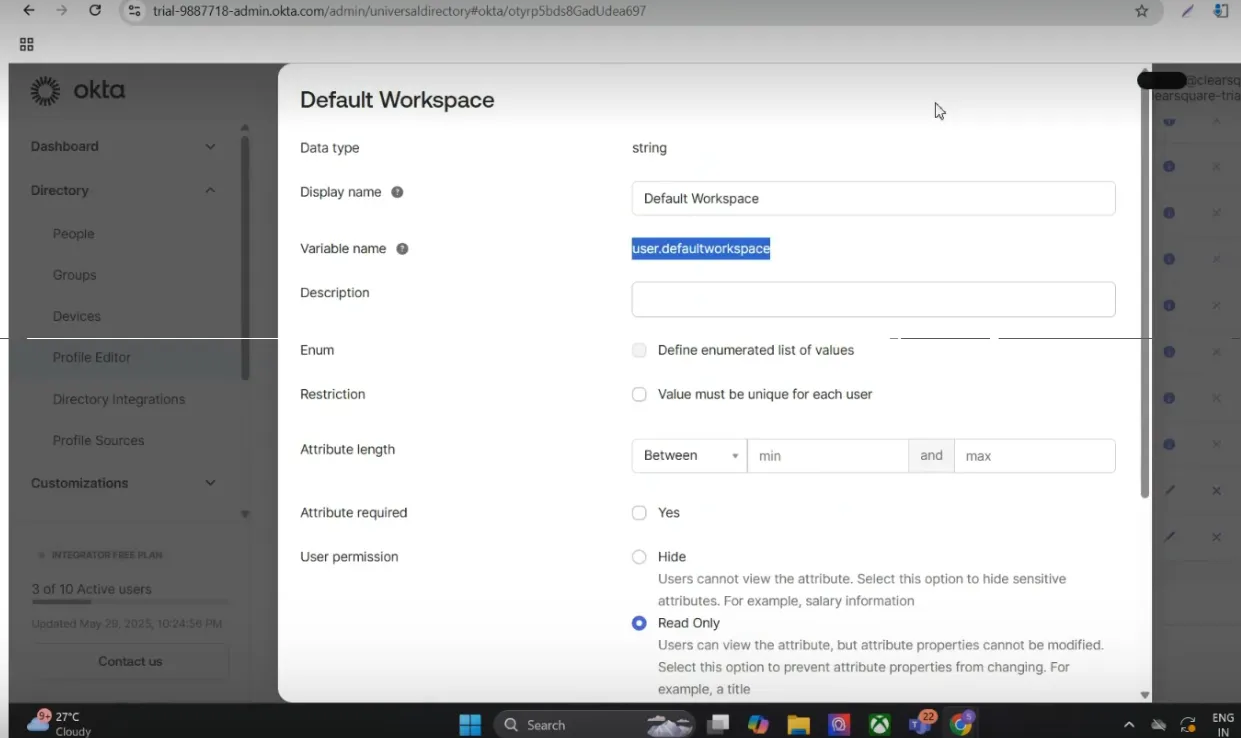
Click Save
2. Configure Attribute in the Okta SSO Application
- Open the SSO Application in Okta
- Go to the Attribute Mappings section
- Add a new attribute using the copied variable name:
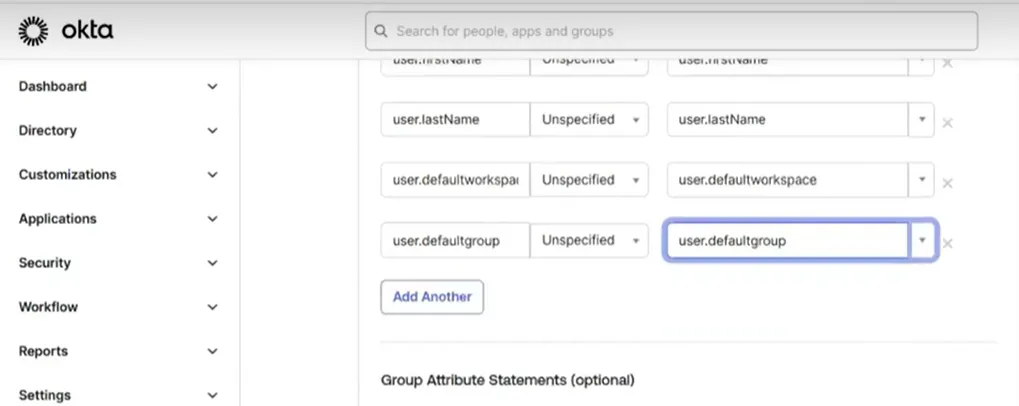
- Example: user.defaultGroup
Save the changes
3. Map Attribute in Clearsquare Portal
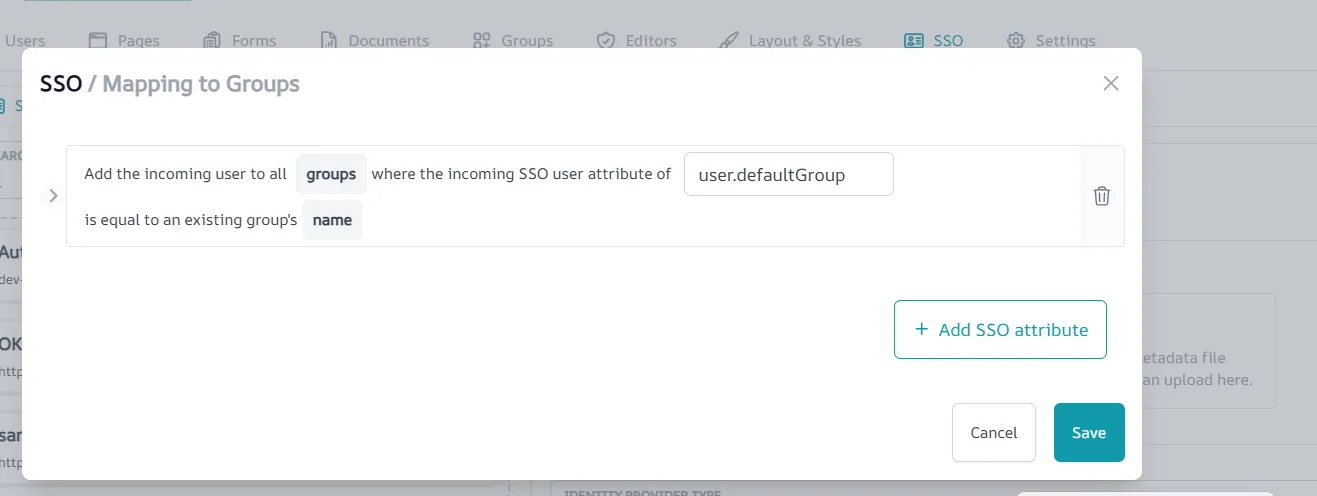
- Log in to the Clearsquare Portal
- Navigate to SSO > Map SSO to Group
Paste the variable name: user.defaultGroup
Save the configuration
4. Assign Group Value to a User in Okta
- In Okta, go to the Users section
- Open any user’s Details Page
- Inside the User Attributes section, click Edit
- Scroll down to find the newly added field DefaultGroup
- Enter the exact group name as it exists in the Clearsquare Portal
- Example: Default
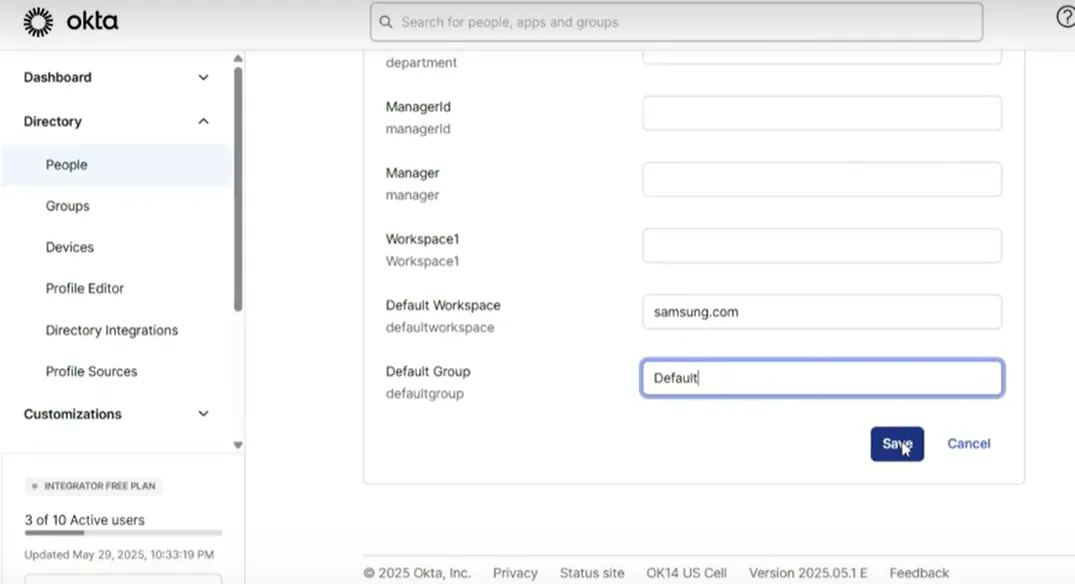
Save the user profile